
How to start a blog and find your first readers (part 2)
Archive Notice
This article was originally published on my former blog, and is preserved here for reference. It reflects my views and approach at the time it was written. Any affiliate links that originally appeared in this article have been removed or disabled.
From idea to website: Hosting, domain, and WordPress setup
In Part 1 of this series, we looked at how to pick your blog’s topic and name. You’ve now got a solid idea of what you want to write about and what you’re going to call your blog.
Now comes the exciting part: getting your blog online.
This is where you take your idea from “just a name on paper” to an actual website framework: the foundation your future blog will be built on. It won’t be polished yet (that’s what we’ll cover in Part 3), but by the end of this page your blog will officially be set up and ready to customize.
In this article, I’ll walk you step-by-step through:
- What hosting and domains actually are (and why you need them)
- Which hosting service to choose
- Exactly how to set up your blog, from domain registration to installing WordPress
Let’s get started.

Hosting and domains
A blog isn’t just an idea. It’s made up of real files (your posts, images, design, settings). Those files need to live somewhere on the internet so anyone can find them. That’s where web hosting comes in.
Think of it like this:
Your blog is a house.
Your domain is the address. (the link people type in to visit, like “myawesomeblog.com”)
Hosting is the land where your house is built.
If you only have an address (domain) but no land (hosting), there’s nowhere for your house (blog) to stand. Visitors will type in your domain and see… nothing.
Hosting is what makes your blog real. It’s space on a special computer (called a server) that’s online 24/7. When someone types in your domain, the server delivers your blog to their screen.
That’s why hosting is an essential step. Without it, your blog simply doesn’t exist online.
Which hosting to choose?
There are many hosting companies out there, and at first, they all seem to offer the same thing. But the differences matter: speed, reliability, price, and how beginner-friendly the setup is.
For a brand-new blogger, you don’t need the fanciest or most expensive option. You need something that’s:
- Affordable (so you can start without a big upfront investment)
- Beginner-friendly (easy setup, clear dashboard, one-click WordPress install)
- Reliable (fast load times, good uptime, secure servers)
- All-in-one (domain, SSL, email, and backups included)
Some of the most popular hosting companies are Hostinger, Bluehost, SiteGround, HostGator, GoDaddy, DreamHost, WP Engine, Namecheap, and GreenGeeks.
Step-by-step: setting up your blog
Here’s how to set up your blog in about an hour:
Step 1: choose a plan
Sign-up with a hosting company.
Step 2: register your domain
During signup, you’ll be prompted to choose your domain name. This is where you enter the name you decided on in Part 1 (e.g. “myblogname.com”).
If you haven’t read Part 1 yet, that’s where we looked into how to pick a strong domain name: what makes a good choice, what to avoid, and some easy brainstorming methods. You can find it here.
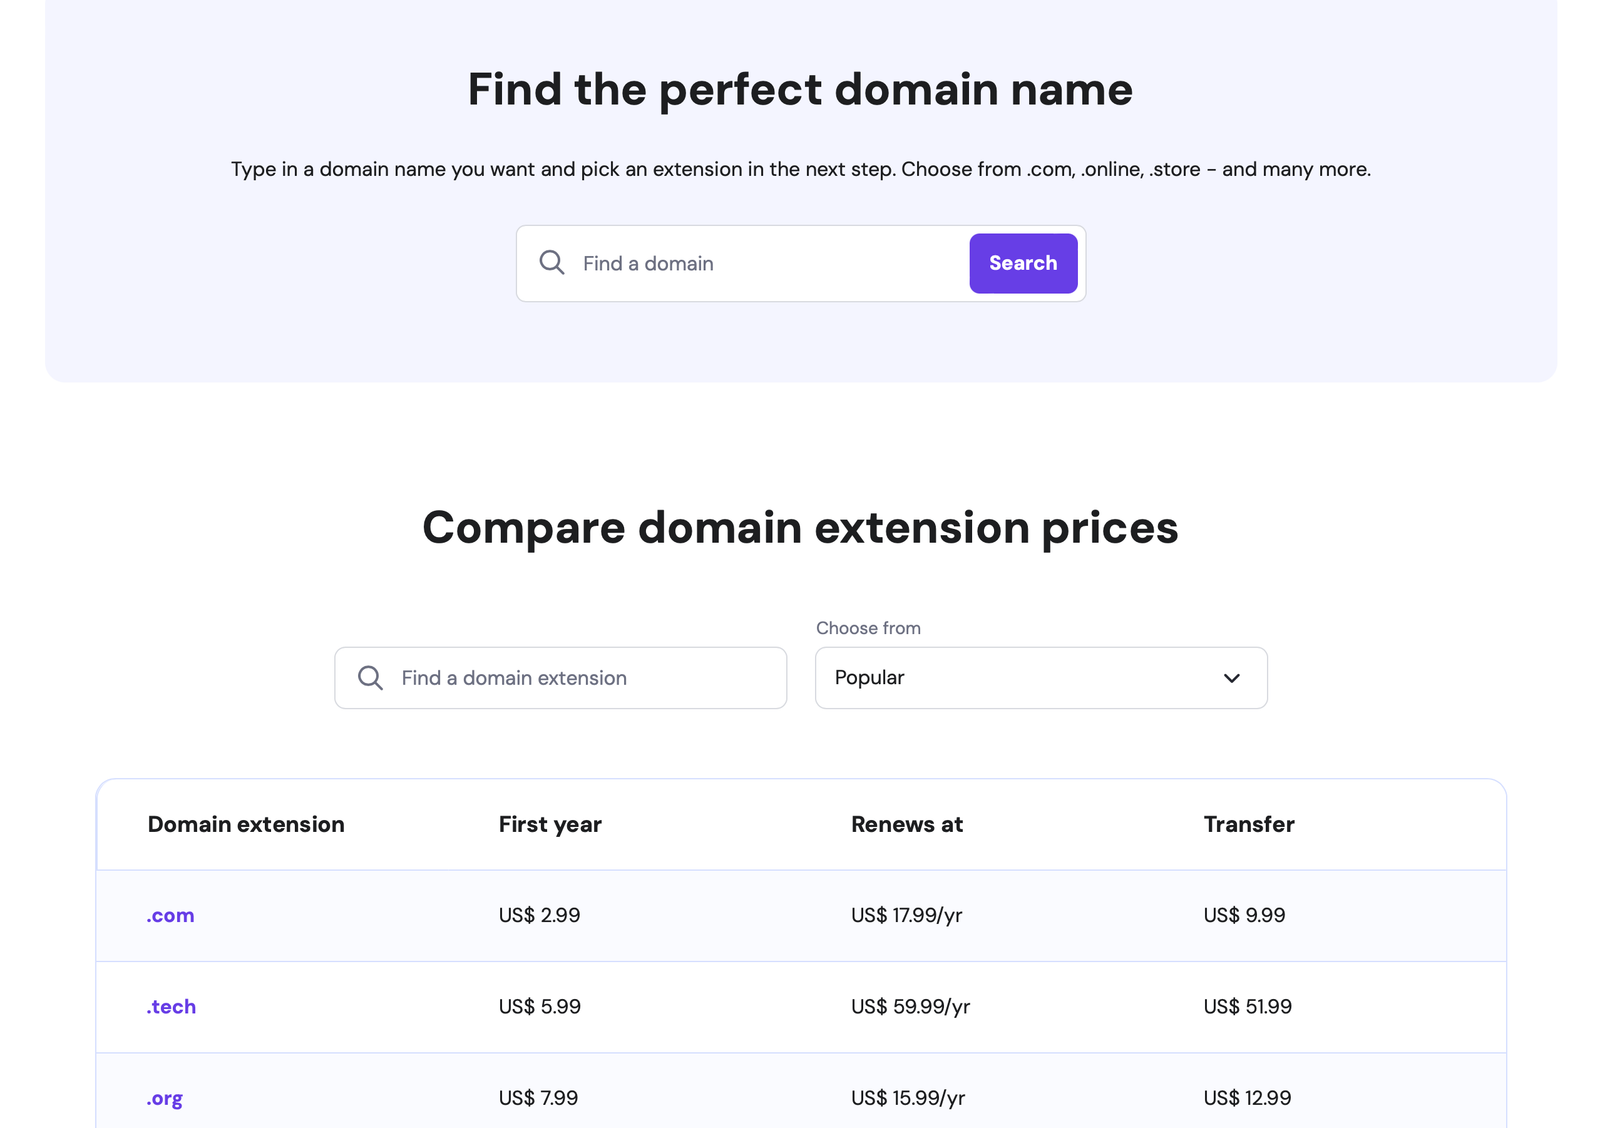
When choosing your domain name, use the search box to check availability and pick an extension (like .com, .org, or .tech). If your first choice isn’t available, try simple variations such as adding “the” or “blog.”
Step 3: create your account and checkout
Fill-in your details and complete payment. Don’t stress about extras like SEO toolkits or email marketing add-ons at checkout. You can always add those later. For now, just grab the hosting + domain.
Step 4: explore your hPanel
Once you’ve signed up, you’ll land in hPanel, your custom dashboard. This is your control center, where you’ll manage everything from hosting to domains, backups, and performance settings. With Hostinger, it looks like this:
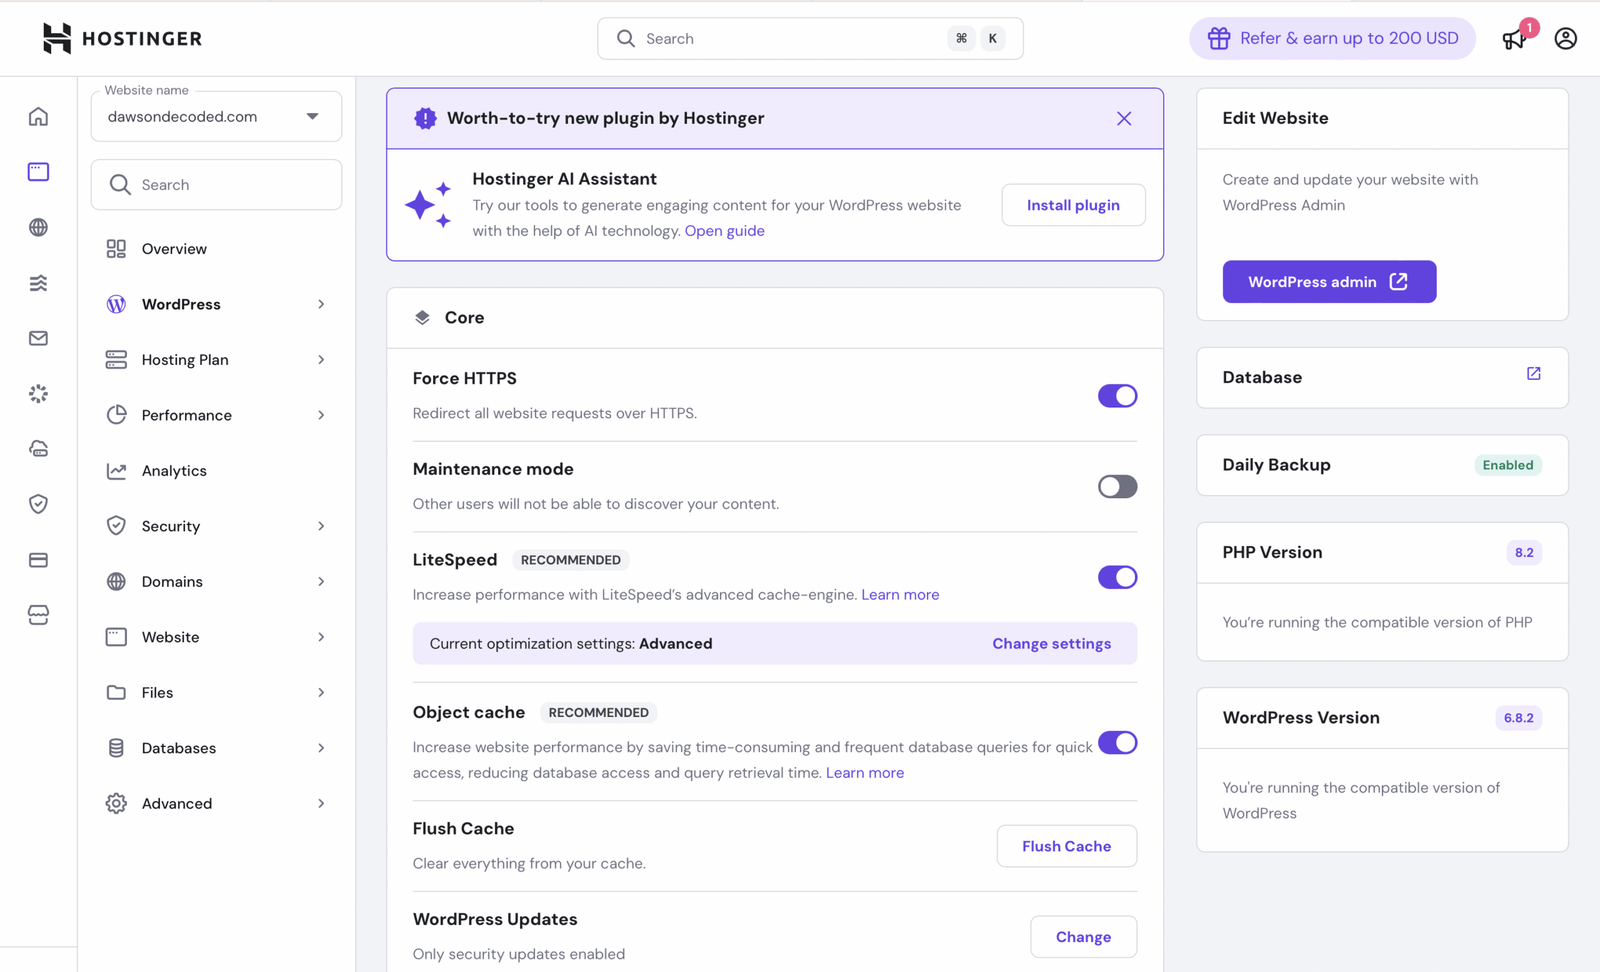
From here, you’ll install WordPress.
Step 5: install WordPress
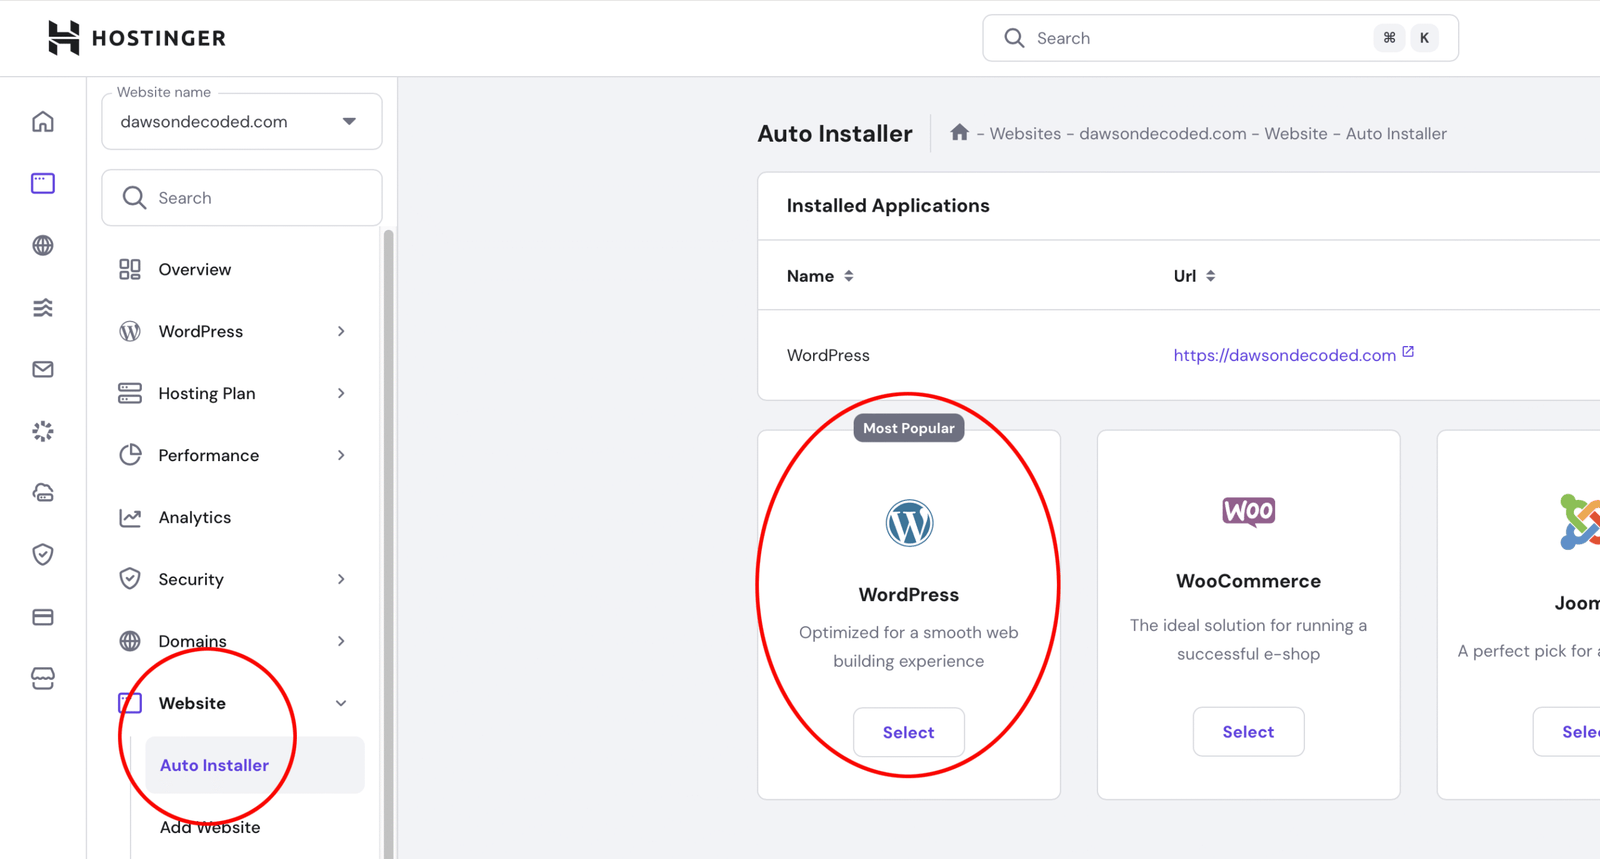
WordPress is the software that powers over 40% of all websites today. It’s flexible, customisable, and free:
- In hPanel, click Website → Auto Installer → WordPress.
- Enter your blog name, email, and create a password.
- Click Install.
That’s it. In less than a minute, WordPress will be installed and your blog will start to take shape. You can now log in to your WordPress dashboard by typing “yourblog.com/wp-admin” into your browser, or by clicking the WordPress Admin button in your hPanel.”
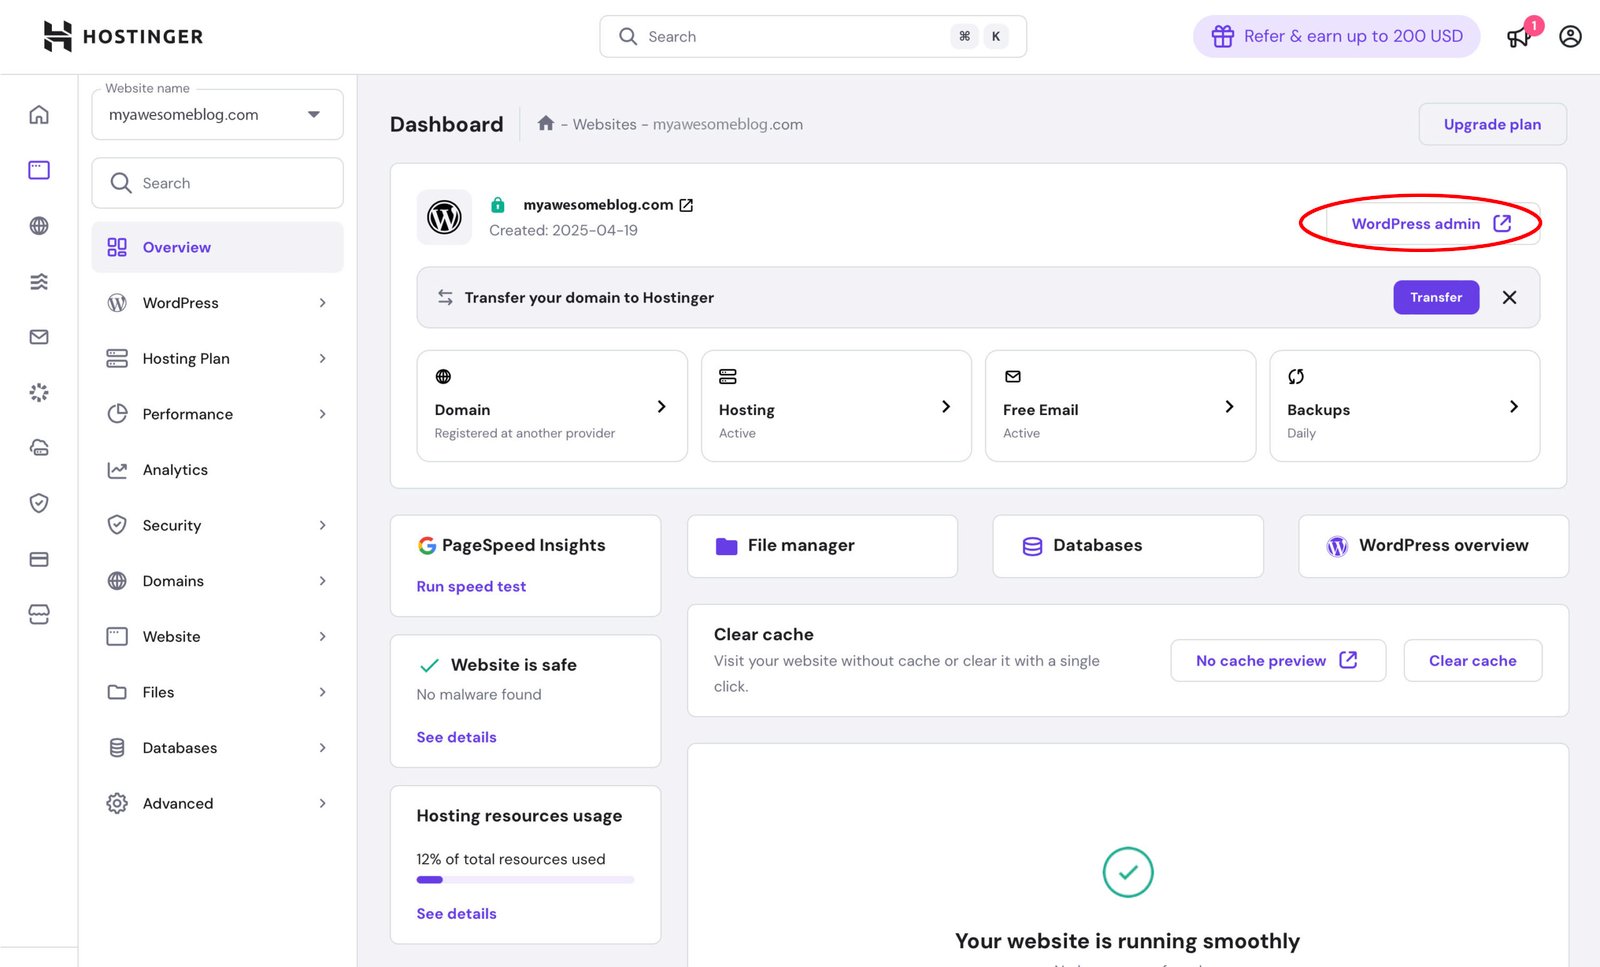
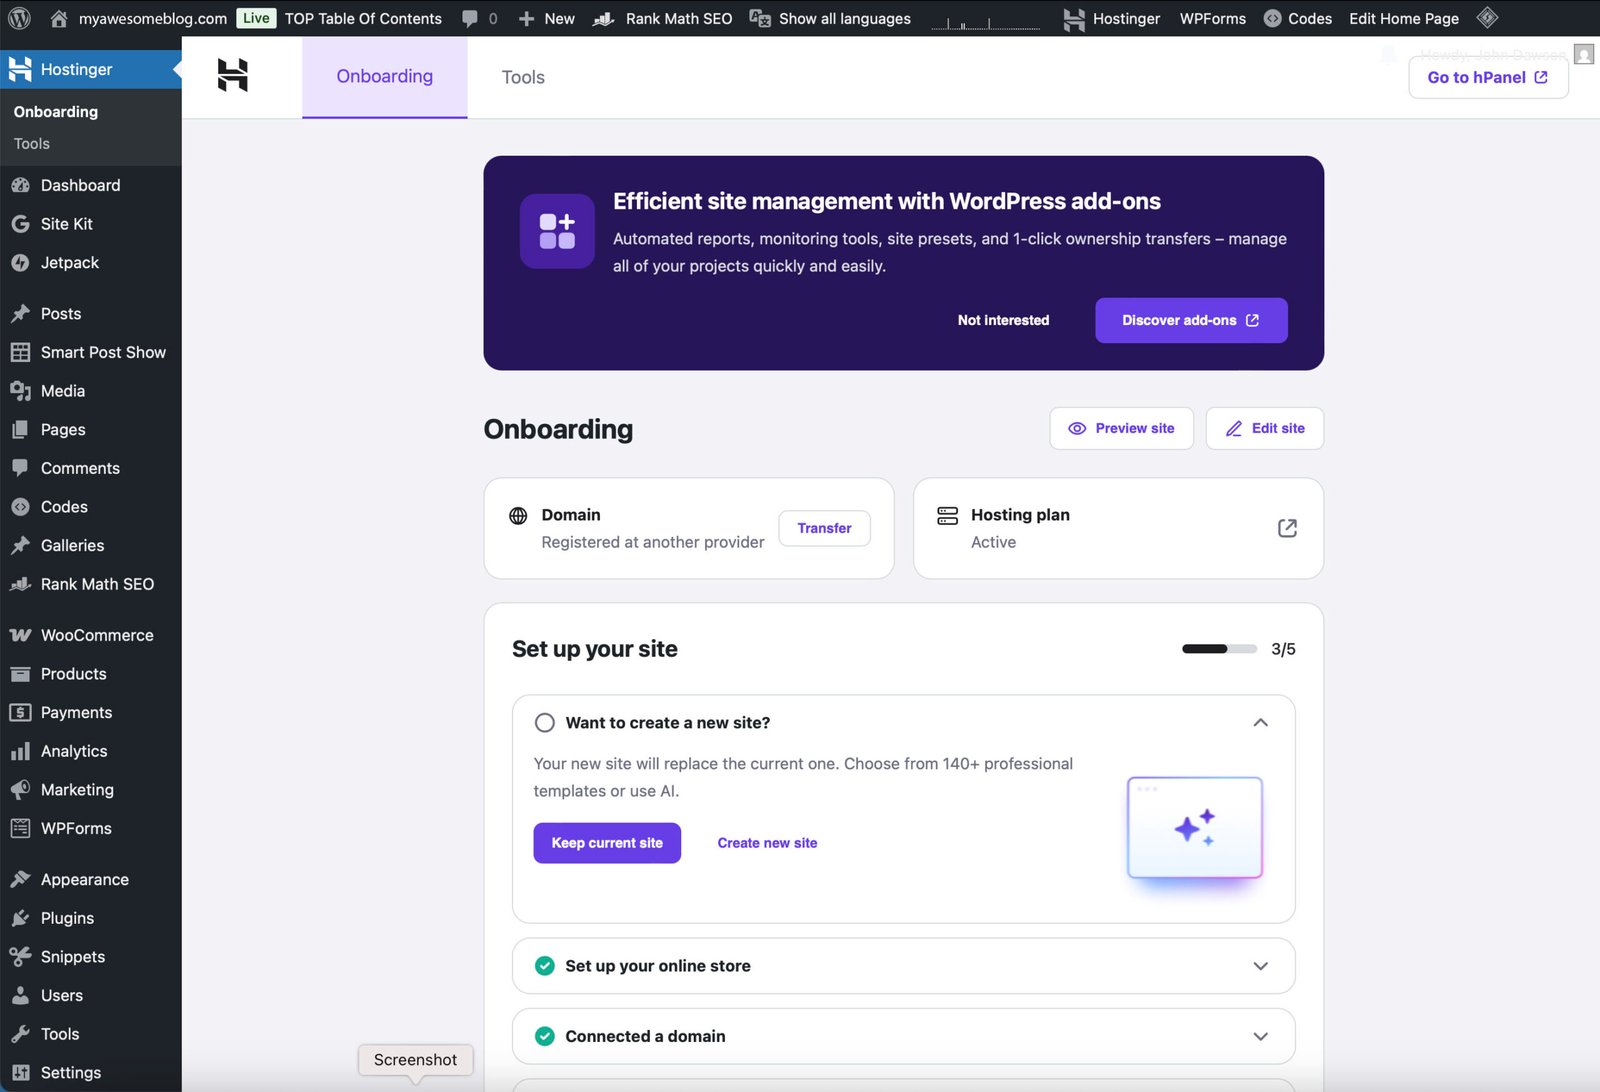
This is your WordPress dashboard: the “control room” of your blog. From here you’ll be able to write posts, create pages, install themes and plugins, and customise your site.
Take a moment to appreciate how far you’ve already come. In just a short time, you’ve chosen and registered a domain name of your own, secured hosting with one of the world’s leading providers, and successfully installed WordPress. What was once just an idea on paper has now become something tangible: the foundations of your blog are in place, and it’s beginning to take shape.
What’s next
In the next part of this series (in part 3/5), we’ll design your blog, choose a theme, and add the must-have pages so it looks professional and ready to share:
- Make it look and feel professional: themes and must-have pages.
Choose a clean, beginner-friendly theme and add the essential pages that make your blog look trustworthy.
Leave a Reply